Customizing Traefik on k3s
Learn how to configure traefik ingress routes.
After completing the tasks from the last article we now have a cluster that can manage external ip addresses for our exposed services and that can assign persistent storage to our pods.
In this article we are going to explore methods for exposing services that do not require dedicated ip addresses :
Ingress Routes managed by the Traefik Reverse Proxy.
- Enabling the Traefik Dashboard
- Application : Creating a simple Nginx Installation
- Creating the Nginx IngressRoute
- Automating Proxy Selection
- Conclusion
Enabling the Traefik Dashboard
Even though i am pretty much a commandline person, i occasionally like to point-and-click in a Dashboard. Let’s enable the Traefik dashboard for that.
Rancher supports post-installation customization of objects with HelmChartConfig resources. The HelmChartConfig resource must match the name and namespace of its corresponding HelmChart, and supports providing additional valuesContent, which is passed to the helm command as an additional value file.
We create a configuration file and apply it to Traefik. While we are at it, we also configure the dashboard for http access. In my home network i can live without having TLS enabled for the dashboard.
#File: 'traefik-custom-conf.yaml'
cat >./traefik-custom-conf.yaml << EOT
apiVersion: helm.cattle.io/v1
kind: HelmChartConfig
metadata:
  name: traefik
  namespace: kube-system
spec:
  valuesContent: |-
    additionalArguments:
      - "--api"
      - "--api.dashboard=true"
      - "--api.insecure=true"
      - "--log.level=DEBUG"
    ports:
      traefik:
        expose: true
    providers:
      kubernetesCRD:
        allowCrossNamespace: true
EOT

kubectl -n kube-system apply -f ./traefik-custom-conf.yaml
Ensure that the reconfiguration worked : Verify that the api.dashboard/api.insecure clauses show up as per our configuration file.
$ kubectl -n kube-system describe deployment/traefik

Name:                   traefik
Namespace:              kube-system
CreationTimestamp:      Thu, 09 Nov 2023 17:06:04 +0100
... (redacted) ...
  Service Account:  traefik
  Containers:
   traefik:
    Image:       rancher/mirrored-library-traefik:2.10.5
    Ports:       9100/TCP, 9000/TCP, 8000/TCP, 8443/TCP
    Host Ports:  0/TCP, 0/TCP, 0/TCP, 0/TCP
    Args:
... (redacted) ...
      --api
      --api.dashboard=true
      --api.insecure=true
      --log.level=DEBUG
    Liveness:   http-get http://:9000/ping delay=2s timeout=2s period=10s #success=1 #failure=3
... (redacted) ...
In order to have the Dashboard available from a permanent external IP Address we create a MetalLB Load Balancer service. The shell commands below create a configuration file and then the service with kubectl apply.
n.b. 1 : to reduce complexity we do not map the dashboard port (9000) to yet another port.
n.b. 2 : the load balancer service is ‘attached’ to the traefik pod by means of the ‘selector’ clauses. When you create such services on your own, make sure that you get them right.
#File: 'traefik-lb-service.yaml'
cat >./traefik-lb-service.yaml << EOT
apiVersion: v1
kind: Service
metadata:
  name: traefik-dashboard
  namespace: kube-system
  labels:
    app.kubernetes.io/instance: traefik
    app.kubernetes.io/name: traefik-dashboard
spec:
  type: ClusterIP
  ports:
  - name: traefik
    port: 9000
    targetPort: traefik
    protocol: TCP
  selector:
    app.kubernetes.io/instance: traefik-kube-system
    app.kubernetes.io/name: traefik
EOT

kubectl -n kube-system apply -f ./traefik-lb-service.yaml
Ensure that everything went according to plan.
$ kubectl -n kube-system get svc/traefik
NAME      TYPE           CLUSTER-IP      EXTERNAL-IP       PORT(S)                                     AGE
traefik   LoadBalancer   10.43.137.173   192.168.100.150   9000:32424/TCP,80:32265/TCP,443:32347/TCP   30d
Looks good. Our Traefik Dashboard should now open at http://192.168.100.150:9000.
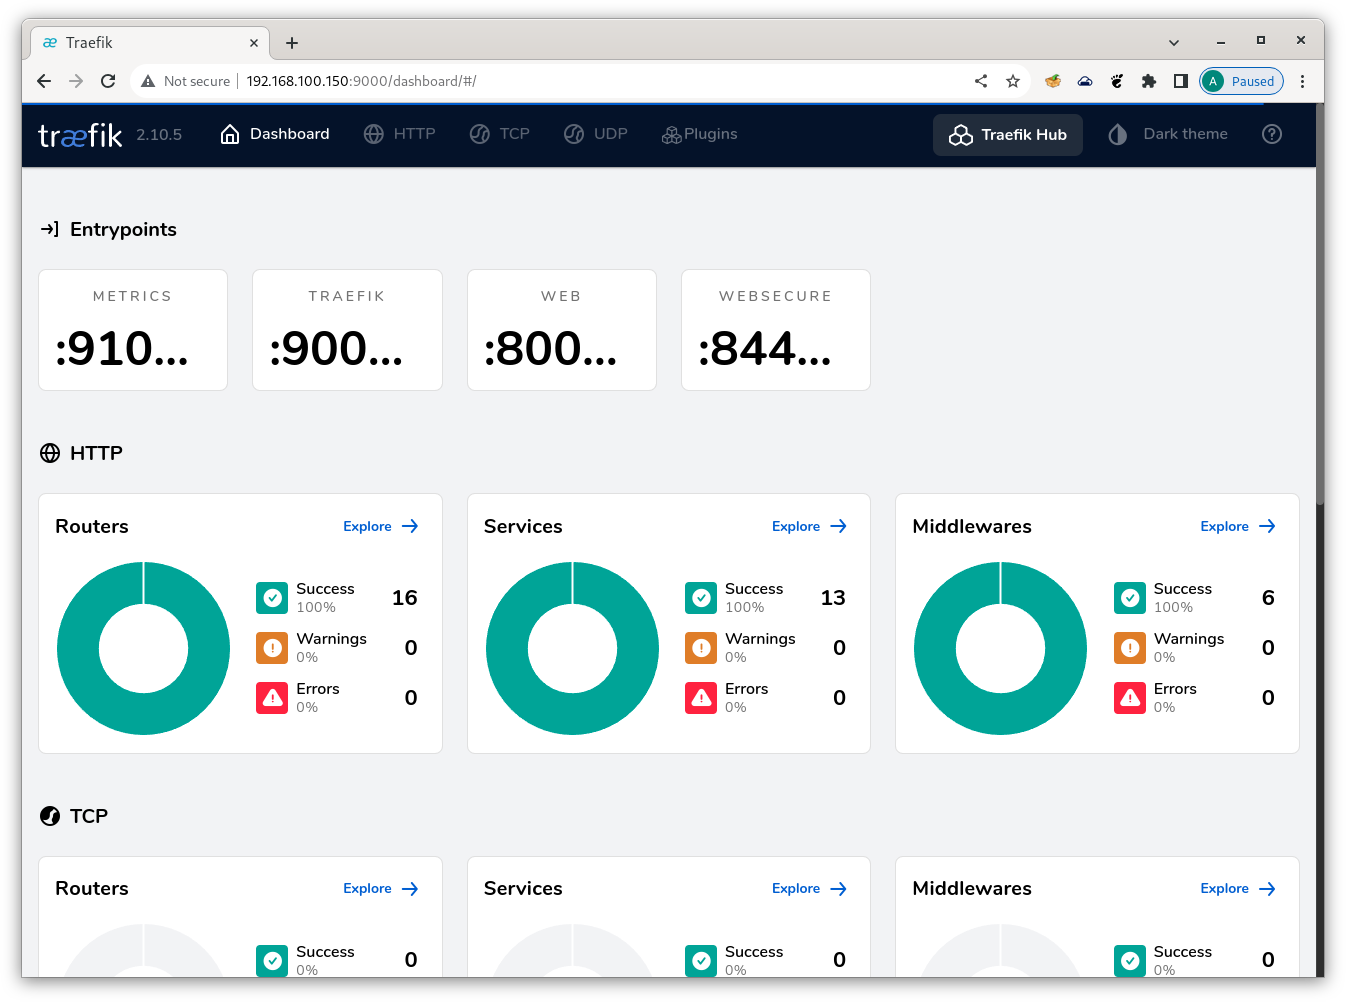
Traefik Dashboard
And so it does.
Application : Creating a simple Nginx Installation
After all the hard work we have earned a bit of fun. Let’s see how the mechanics of exposing a service with an Ingress Route actually work. Since we don’t have a build pipeline yet (that requires a private image registry and a build process, something that I will cover in a future blog) we will have to use an image from Docker Hub. Here goes :
- create the namespace ‘nginx’
- create a deployment from the ‘nginx’ image from docker hub
- list all resources from the namespace
$ kubectl create namespace nginx

$ kubectl -n nginx create deployment nginx --image=nginx

$ kubectl -n nginx get all
NAME                         READY   STATUS    RESTARTS   AGE
pod/nginx-77b4fdf86c-bg5jn   1/1     Running   0          4h14m

NAME                    READY   UP-TO-DATE   AVAILABLE   AGE
deployment.apps/nginx   1/1     1            1           4h14m

NAME                               DESIRED   CURRENT   READY   AGE
replicaset.apps/nginx-77b4fdf86c   1         1         1       4h14m
As you can see, there is no service to link to yet, so the next step is to create one.
$ kubectl -n nginx expose deployment nginx --port=8080 --target-port=80
service/nginx exposed

$ kubectl -n nginx get svc -o wide

NAME    TYPE        CLUSTER-IP     EXTERNAL-IP   PORT(S)    AGE    SELECTOR
nginx   ClusterIP   10.43.73.209   <none>        8080/TCP   101s   app=nginx
This service maps port 80 exposed by the nginx pod to port 8080 (this is for educational purposes, not for any technical requirements), so port 8080 is what we will have to refer to in our Ingress Route. Let’s see if we can submit requests to the Nginx server with the addresses we currently have.
For that to work you will have to ssh into the master node. Cluster IP addresses are only resolvable inside the cluster.
Our first destination will be the nginx pod. Grab its cluster ip address from the description :
$ kubectl -n nginx describe pod/nginx-77b4fdf86c-bg5jn

Name:             nginx-77b4fdf86c-bg5jn
Namespace:        nginx
...<redacted>...
IP:               10.42.3.115
IPs:
  IP:           10.42.3.115
...<redacted>...
A simple HTTP GET (via port 80) should be sufficient.
# curl -v http://10.42.3.115:80/
*   Trying 10.42.3.115:80...
* Connected to 10.42.3.115 (10.42.3.115) port 80 (#0)
> GET / HTTP/1.1
> Host: 10.42.3.115
> User-Agent: curl/7.74.0
> Accept: */*
>
* Mark bundle as not supporting multiuse
< HTTP/1.1 200 OK
< Server: nginx/1.25.3
< Date: Sun, 10 Dec 2023 15:14:02 GMT
< Content-Type: text/html
< Content-Length: 615
< Last-Modified: Tue, 24 Oct 2023 13:46:47 GMT
< Connection: keep-alive
< ETag: "6537cac7-267"
< Accept-Ranges: bytes
<
<!DOCTYPE html>
<html>
<head>
<title>Welcome to nginx!</title>
<style>
html { color-scheme: light dark; }
body { width: 35em; margin: 0 auto;
font-family: Tahoma, Verdana, Arial, sans-serif; }
</style>
</head>
<body>
<h1>Welcome to nginx!</h1>
<p>If you see this page, the nginx web server is successfully installed and
working. Further configuration is required.</p>

<p>For online documentation and support please refer to
<a href="http://nginx.org/">nginx.org</a>.<br/>
Commercial support is available at
<a href="http://nginx.com/">nginx.com</a>.</p>

<p><em>Thank you for using nginx.</em></p>
</body>
</html>
* Connection #0 to host 10.42.3.115 left intact
That looks good. Let’s try with the service (via port 8080).
# curl -v http://10.43.73.209:8080/
*   Trying 10.43.73.209:8080...
* Connected to 10.43.73.209 (10.43.73.209) port 8080 (#0)
> GET / HTTP/1.1
> Host: 10.43.73.209:8080
> User-Agent: curl/7.74.0
> Accept: */*
>
* Mark bundle as not supporting multiuse
< HTTP/1.1 200 OK
< Server: nginx/1.25.3
< Date: Sun, 10 Dec 2023 15:15:30 GMT
< Content-Type: text/html
< Content-Length: 615
< Last-Modified: Tue, 24 Oct 2023 13:46:47 GMT
< Connection: keep-alive
< ETag: "6537cac7-267"
< Accept-Ranges: bytes
<
<!DOCTYPE html>
<html>
<head>
<title>Welcome to nginx!</title>
<style>
html { color-scheme: light dark; }
body { width: 35em; margin: 0 auto;
font-family: Tahoma, Verdana, Arial, sans-serif; }
</style>
</head>
<body>
<h1>Welcome to nginx!</h1>
<p>If you see this page, the nginx web server is successfully installed and
working. Further configuration is required.</p>

<p>For online documentation and support please refer to
<a href="http://nginx.org/">nginx.org</a>.<br/>
Commercial support is available at
<a href="http://nginx.com/">nginx.com</a>.</p>

<p><em>Thank you for using nginx.</em></p>
</body>
</html>
* Connection #0 to host 10.43.73.209 left intact
Looking good as well. Now that we have established that our Nginx service is willing and able to process requests from within the cluster, we will try from outside.
Creating the Nginx IngressRoute
Ingress Routes come in all shapes and sizes. For this example i will pick a fairly simple type : host-based routing.
#File: './nginx-ingressroute-host.yaml'
$ cat > ./nginx-ingressroute-host.yaml << EOT
apiVersion: traefik.containo.us/v1alpha1
kind: IngressRoute
metadata:
  name: nginx
  namespace: nginx
spec:
  entryPoints:
    - web
  routes:
  - match: Host(`nginx.kippel.k3s`)
    kind: Rule
    services:
    - name: nginx
      namespace: nginx
      port: 8080
EOT

$ kubectl -n nginx apply -f ./nginx-ingressroute-host.yaml
ingressroute.traefik.containo.us/nginx created

$ kubectl -n nginx describe IngressRoute/nginx
Name:         nginx
Namespace:    nginx
Labels:       <none>
Annotations:  <none>
API Version:  traefik.containo.us/v1alpha1
Kind:         IngressRoute
Metadata:
  Creation Timestamp:  2023-12-10T14:40:41Z
  Generation:          1
  Managed Fields:
    API Version:  traefik.containo.us/v1alpha1
    Fields Type:  FieldsV1
    fieldsV1:
      f:metadata:
        f:annotations:
          .:
          f:kubectl.kubernetes.io/last-applied-configuration:
      f:spec:
        .:
        f:entryPoints:
        f:routes:
    Manager:         kubectl-client-side-apply
    Operation:       Update
    Time:            2023-12-10T14:40:41Z
  Resource Version:  3676985
  UID:               263df986-8ed7-44b4-a897-fd9f52fea621
Spec:
  Entry Points:
    web
  Routes:
    Kind:   Rule
    Match:  Host(`nginx.kippel.k3s`)
    Services:
      Name:       nginx
      Namespace:  nginx
      Port:       8080
Events:           <none>
nginx Ingress Route
One attribute that is missing from the IngressRoute description is a cluster ip address. We will look into the Kubernetes SDN (software defined network) in more depth in a future article. For the moment it is sufficient to remember that Traefik acts as a (reverse) proxy, so all requests meant for the Nginx server at the far end of this route have to use the proxy protocol.
Let’s try that.
$ curl -v -x http://192.168.100.150:80 http://nginx.kippel.k3s/

*   Trying 192.168.100.150:80...
* Connected to 192.168.100.150 (192.168.100.150) port 80 (#0)
> GET http://nginx.kippel.k3s/ HTTP/1.1
> Host: nginx.kippel.k3s
> User-Agent: curl/8.0.1
> Accept: */*
> <b>Proxy-Connection: Keep-Alive</b>
>
< HTTP/1.1 200 OK
< Accept-Ranges: bytes
< Content-Length: 615
< Content-Type: text/html
< Date: Sun, 10 Dec 2023 15:19:20 GMT
< Etag: "6537cac7-267"
< Last-Modified: Tue, 24 Oct 2023 13:46:47 GMT
< Server: nginx/1.25.3
<
<!DOCTYPE html>
<html>
<head>
<title>Welcome to nginx!</title>
<style>
html { color-scheme: light dark; }
body { width: 35em; margin: 0 auto;
font-family: Tahoma, Verdana, Arial, sans-serif; }
</style>
</head>
<body>
<h1>Welcome to nginx!</h1>
<p>If you see this page, the nginx web server is successfully installed and
working. Further configuration is required.</p>

<p>For online documentation and support please refer to
<a href="http://nginx.org/">nginx.org</a>.<br/>
Commercial support is available at
<a href="http://nginx.com/">nginx.com</a>.</p>

<p><em>Thank you for using nginx.</em></p>
</body>
</html>
* Connection #0 to host 192.168.100.150 left intact
curl Output for Ingress Route
Except for the Proxy-Connection: Keep-Alive tag from the response there is no difference in the result. Not bad at all !
Automating Proxy Selection
If you (like me) are running your own DNS/DHCP server in your network, there is a simple way to automate request routing over the Traefik proxy : DHCP Option 252. Create a PAC file on any server (i decided to use the dnsdhcp server)
#File: '/etc/proxy/proxy.pac'
cat > /etc/proxy/proxy.pac << EOT
function FindProxyForURL(url, host)
{
    host = host.toLowerCase();
    var k3sproxy = "PROXY 192.168.100.150:80; DIRECT";

    // proxy request to K3S Kubernetes Cluster
    if (shExpMatch(host,"*.kippel.k3s"))
    {
        return k3sproxy;
    }

    // everything else is not proxied
    return direct;
}
EOT
expose it for download (i used the Python HTTP.Server module)
#File: '/etc/systemd/system/autoproxy.service'
cat > /etc/systemd/system/autoproxy.service << EOT
[Unit]
Description=Autoproxy Service
After=network.target

[Service]
ExecStart=python3 -m http.server --directory=/etc/proxy 8080
WorkingDirectory=/etc/proxy
StandardOutput=inherit
StandardError=inherit
Restart=always
User=pi

[Install]
WantedBy=multi-user.target
EOT

systemctl enable autoproxy
systemctl start autoproxy
autoproxy Systemd Configuration
and add the configuration below to your /etc/dnsmasq.conf file.
##
#   Configure autoproxy for routing
#   to openshift codeready and kubernetes k3s
##
dhcp-option=252,http://dnsdhcp.kippel.de:8080/proxy.pac
After refreshing the WiFi connection on your tablet, http://nginx.kippel.k3s/ should now get you the Nginx Splash Screen.

nginx Splash Screen
For Windows workstations this will also work out of the box. With Linux workstations you might have to manually tweak the proxy settings.
Conclusion
With IngressRoutes we now have a means to expose an arbitrary number of services outside of our cluster without having to use a precious external ip address for every service. There is more to be said about Traefik, but we will postpone that for a later blog.
Stay tuned !